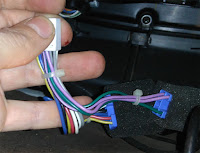
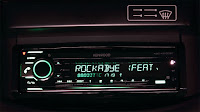
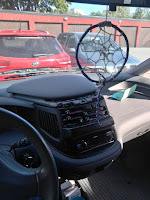
Remove bench middle row.. Looks clean
Pictures from Dan Zafr
Blog about mostly the first version of Toyota Previa. Previas are affectionately called "eggvans", "eggs", or "beans", because of their shape. They are reliable and fits in a normal swedish garage. Mid engine makes them very road worthy. They will become classics.. Toyota at it's prime; within the 90-era everything from Toyota was bulletproof, from the Lexus ls400 to corolla (including Starlets and Previa)
Wednesday, November 29, 2017
Thursday, November 9, 2017
Wednesday, October 18, 2017
What to do with your Egg seats!
Saturday, September 30, 2017
DIY: How to wire up electrics on towbar (WITHOUT can bus wiring), easy
Showing how I connected the most common functions for towing a caravan.
Normal light,
Turning indicators, left, right
And Braking light..
Car: Toyota Previa -98, but same principle
for older cars, this is not for can bus cars
Trailer / Towbar wiring
Normal light,
Turning indicators, left, right
And Braking light..
Car: Toyota Previa -98, but same principle
for older cars, this is not for can bus cars
Trailer / Towbar wiring
Saturday, August 26, 2017
Home is where your Previa is...
Some pictures from Bill Chin at the Burning Man Arts & Entertainment Festival... I especially like the sticker "Home is where your Previa is".. :)
|
|
 |
| Remove interior and in with a sleeping bad. Keep it simple and go.. |
Friday, August 18, 2017
Review of the Kenwood KDC-X5100BT installed in the Previa
Finding a review or demostration for the car stereo you are interested in is very hard. When I was doing research for a new Car Stereo I had a hard time finding useful information. I dont really know why, but I decided to make a video showing what car audio I finally did end up with and show some features of the new Kenwood KDC-X5100BT.
In Sweden it cost about 1500 SEK and you get an astonishing amount of features. Rear USB, Flac 48 kHz / 24 bit. 3x4V preout, Crossover, DSP, Time alignment and the list goes on.
In Sweden it cost about 1500 SEK and you get an astonishing amount of features. Rear USB, Flac 48 kHz / 24 bit. 3x4V preout, Crossover, DSP, Time alignment and the list goes on.
|
|
|  |
|
|
 | . |
Tuesday, August 15, 2017
Getting a new Stereo for the Toyota Previa (TCR11)
Time to take the Previa and go look for a new head unit.. Diffrent shots from the Toyota Previa..
Sunday, August 6, 2017
How to remove old car stereo and install a Bluetooth stereo, Kenwood KDC X5100BT in Toyota Previa
How to remove old car stereo and install a Bluetooth stereo, Kenwood KDC X5100BT
 |
| Just bought it @ Bilstereohörnan in Västerås, Sweden |
Car: Toyota Previa Mk1
Stereo: Kenwood KDC-X5100BT
I show you the ISO connector / adapter for simple installation, matching your car.
Disclaimer: Take you own responsibility and educate yourself before doing this type of work. And remember before you start: As a precaution remove the negative battery pole connector.
Car Stereo Installation step by step (Head Unit Install)
The Kenwood car audio has Bluetooth, Rear USB, Rear Aux, Flac 24-bit / 48 kHz, Variable led display. Can connect 2 different phones at the same time. It has a indicator on the front face showing status. It has a register of 5 paired devices in memory. You can control it via an application, Kenwood Remote that you download to your phone.
The Stereo also has a CD-receiver. It has lots of features. I will do a review later, keep your eyes open.
 |
|
|
|
|
|
|  |
Kenwood KDC-X5100BT, Replace / Remove and install an aftermarket Car Stereo, Remove old Car Stereo, Single DIN, Installation,
Toyota Previa, Toyota Tarago, Toyota Estima, Install Bluetooth Car Stereo,
Saturday, August 5, 2017
1999 Previa for sale (HWL549)
Before I bough my Previa I was considering buying this Previa. But it was located pretty far away from where I lived. It was advertised for a long time. When it was time for vacation I went to have a look at it..
Selling for 34500 SEK
1999
New lower price 2016-06-22
29900 SEK
As I said, I went to look and see it. About 400 km from my home.. Just got sold when I arrived. But it wasnt in that good shape and it was leaking.. So I'm pretty glad it got sold so I didnt have to buy it. :)
How many owners? Pretty much:
Pictures from nice seller, via MMS
Selling for 34500 SEK
1999
"AC, CD-stereo Original, 2*Elhiss, Elspeglar, Centrallås, ABS, Airbags, Servo, Året runt däck, 7-sitsig, Tiltratt, Uttagen Feb -00, Bakspoiler, Besiktigad t.o.m 1 Feb -17, 132 Hkr, Endast 14.100 mil!"Pictures from the ad: from: https://www.blocket.se/kronoberg/Toyota_Previa_2_4i_GL_7_sits_Uttagen_Feb__00_65680766.htm?ca=9&w=3
 |  |
 |  |
 |  |
 |  |
 |  |
New lower price 2016-06-22
29900 SEK
As I said, I went to look and see it. About 400 km from my home.. Just got sold when I arrived. But it wasnt in that good shape and it was leaking.. So I'm pretty glad it got sold so I didnt have to buy it. :)
 |
| The car was located in Ljungby, Bilstallet.. Far from home.. Took 2 trains and 1 bus just to get there. |
 |  |
 |  |
 |  |
 |  |
 | . |
Thursday, August 3, 2017
Remove car stereo in a Previa/Tarago
Remove car stereo in a Toyota Tarago / Previa / Estima.
In my quest for searching for info about wiring Harness adaptor and colors of wire and so on I've gather this information.
I also took some pictures when I removed the stereo.. Hope you find it useful somehow..
Toyota Previa CD radio stereo wiring harness adapter lead loom ISO converter.
|  |
|
|
Can buy such an ISO adapter, but can also splice it with the cable that comes with and cut down below (but chances are that you do something wrong). And cut it directly with the Pioneer Contact.
 |
|
 |  |
 |  |
|
|
 |  |
 |
|
 |  |
 |  |
 |  |
 |  |
 |  |
http://www.instructables.com/id/Upgrading-a-car-radio-for-a-Toyota-Corolla/step2/Connecting-the-wires/
Youtube
http://tarago.blogspot.se/2009/01/removing-stereo-from-98-tarago-previa.html
another link, not as good as the first.
http://previavan.blogspot.se/2008/04/how-do-you-remove-stereo-in-toyota.html
Car Radio Battery Constant 12v+ Wire: Blue/Yellow (might be red on Tarago)
Car Radio Accessory Switched 12v+ Wire: Gray
Car Radio Ground Wire: Brown
Car Radio Illumination Wire: Green
Car Stereo Dimmer Wire: N/A
Car Stereo Antenna Trigger Wire: Black/Red
Left Front Speaker Positive Wire (+): Pink
Left Front Speaker Negative Wire (-): Purple
Right Front Speaker Positive Wire (+): Green (Light Green)
Right Front Speaker Negative Wire (-): Blue
Left Rear Speaker Positive Wire (+): Black
Left Rear Speaker Negative Wire (-): Yellow
Right Rear Speaker Positive Wire (+): Red
Right Rear Speaker Negative Wire (-): White
Subscribe to:
Comments (Atom)


